
Diagonal Line Tutorial for Photoshop
What is this tutorial about?
This is a tutorial to learn how to make diagonal lines on pictures using Photoshop CS. You could also use this tutorial in other versions of Photoshop, but the buttons and everything wouldn't be in the same spots. You can download a 30 day trail version of Photoshop at PhotoshopSupport.Com
The tools
To avoid any confusion you can see an overview of all the Photoshop tools below, including their names and numbers.
Step 1: Getting started
We're going to start off by of course opening Photoshop.
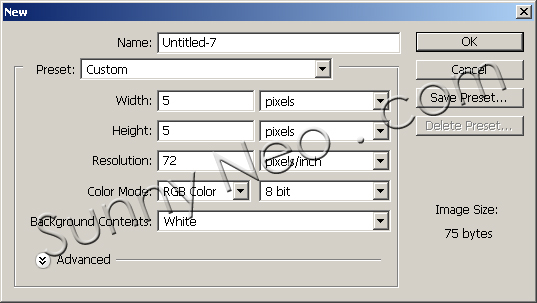
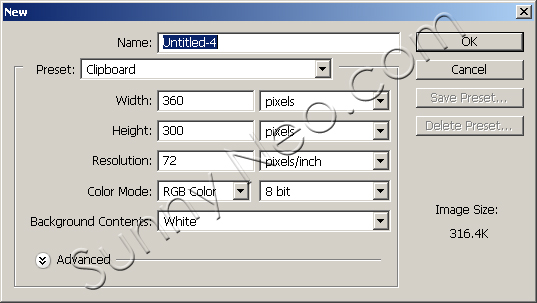
Now you need to open a new document. Go to "File > New" and make your settings match the ones you can see in the image below (except the file name, that is not important). After you've done this, press OK.
Now that you have a new document opened, you need to create a new layer, so you're not drawing on the background. To do this, go to "Layer > New > Layer" (or hit Crtl+Shift+N). You will be asked to name the layer etc, you don't need to so this, just press OK.
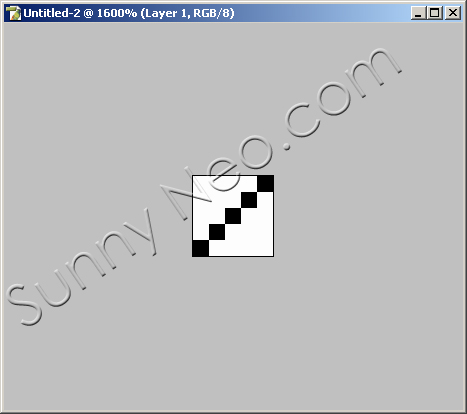
You will see a very tiny white square on a grey background, this is the canvas. By scrolling down you can zoom in to the canvas.
Step 2: Making a pattern
First you need to select the Pencil Tool (tool #8, it's under the Brush Tool, so press that tool with your mouse and keep holding it down till a menu appears where you can choose the Pencil Tool). Make sure your pencil is set to 1 pixel (you can see this in the top bar, it will say 1). Then draw a diagonal line, like the one shown below:
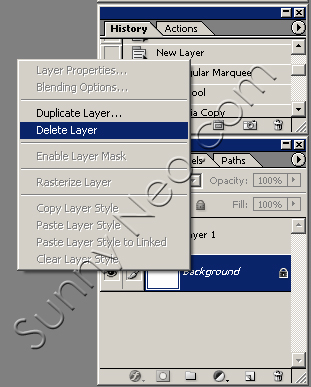
The next step is to delete the background. Right-click on your background layer in your layers pallet, and click "Delete Layer."
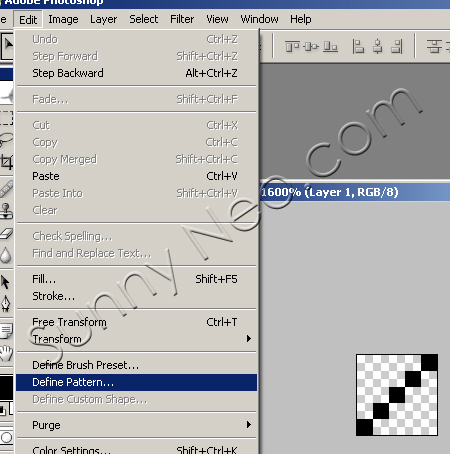
Your image should now look like the one below. To make your diagonal line a pattern, go to "Edit > Define Pattern". You will then be asked to name your pattern.
Step 3: Applying the pattern
Now it's time to apply your pattern to an image. First of all find yourself a nice looking image, in this tutorial we have used this image: click. Copy the image to your clipboard.
Now you need to create a new document, for our example the settings are like below. If you used an image with a different height and width your settings may be slightly different, but be sure your preset is Clipboard:
Paste your image on to your canvas.
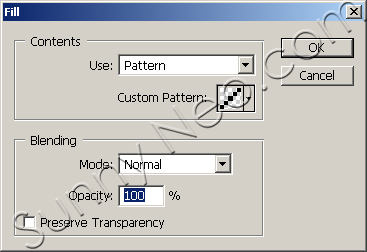
Now create a new layer on top of your image (Ctrl+Shift+N or "Layer > New > Layer"). Go to "Edit > Fill" and make your settings match the picture below (make sure you choose your diagonal pattern for the "Custom Pattern" fill):
Click OK and your image should look like the one below. We don't want plain black lines, so we need to set the blending mode of this layer to Soft Light. You can find the blending mode in the layer menu on the bottom right side of your screen, above all of your layers. It will be set to Normal, but you should change it to Soft Light, as you can see in the image below:
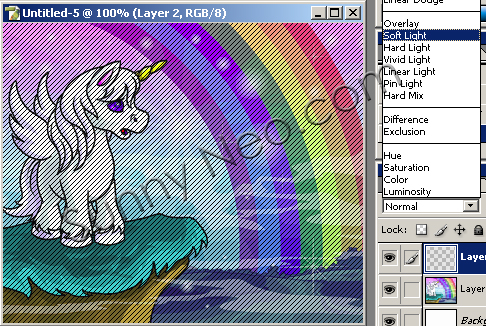
This will give you the finished product, ta-da!

 {{ loadingMessage || 'Loading, one moment please'}}

