Step 1 -
Read the Journal to see what is going on. You can click on the journal to see a picture of the map, and then another click sends you back to the journal page.
|
Journey to the Lost Isle
Sailors often whisper to each other about the old legend of Mad Tongue Murphy, the delirious castaway who was rescued at sea. Some tales say that he was driven mad by his long, lonely days of drifting, while others insist that he was cursed when he landed on a mysterious island, a place he often raved about in his crazed ramblings. The only records of his travels lay in his journal, which has now fallen into the capable hands of Professor Hugo Fairweather, archeolinguist and expert of ancient lore. Only time will show what he can make of it...
|
Step 2 -
Click on "To the adventure" to go to the Plot comic. Read it.
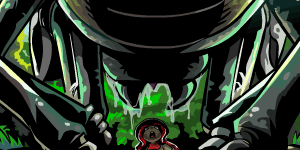
Who would have guessed that our brave explorers would travel all the way to a mysterious isle just to get eaten by a giant monster? Maybe they will find a way out of this terrible situation.
|
Step 3 -
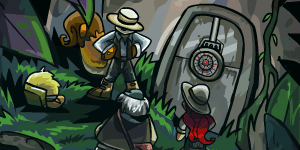
The explorers seem to have reached possible safety, but how are they going to get inside?
|
Go back to the journal and click on 'To the puzzle'. This brings you to the Mysterious Stone Temple.
|
Mysterious Stone Temple
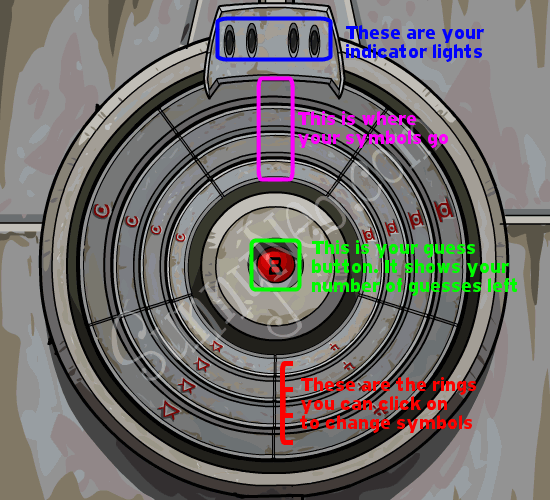
In order to enter this strange structure, you must enter the correct keycode using the key rings. Fortunately, the lock comes with a handy prompt system of flashing lights that lets you know how close your guess is. In the interest of maintaining high security, the keycode is reset if it is not guessed correctly after a number of tries. At that point, the rings return to the neutral position, and you must start over.
Simply click on a ring to move the next symbol into the red code position. To move a ring backward, hold SHIFT or CNTRL while clicking on a ring. Once you have all the rings in the position you like, click the red button in the center of the lock. For each symbol that is correct in the code you entered, one of the lights in the middle will light up. A yellow light indicates that a symbol in the keycode you've entered is part of the correct code, but not in the correct position. A green light indicates that a symbol in the code you entered is the correct symbol, as well as in the correct position.
NOTE: There is no correlation between the position of the lights and the position of the rings. The lights only tell you how many symbols you have correct. They do NOT tell you where they are.
|
|
In order to enter the temple, you must solve three puzzles. Everyone's puzzles are different!
In level 1 you have four rings you need to put in the right position and you have 8 guesses to do so. Level 2 has 5 rings, with 10 guesses to unlock the code. Level 3 has 6 rings and you get 15 guesses.
You need to click on the rings to create a combination of symbols that will unlock the next level. If you think you have got the symbols right, click the red button in the middle of the circle. It will then tell you how close you are by using the indicator lights at the top of the screen.
| Green: | one of the symbols you entered is correct and in the right position. |
| Yellow: | one of the symbols you entered is correct but not in the right position. | | No light: | one of the symbols you entered is not in the puzzle.
|
The red button in the middle indicates how many guesses you have left. If you run out of guesses the level will reset and you will have to start over.
Tip: Test all the symbols first, to see which symbols are actually in the puzzle and which aren't. Enter the same symbol for each ring, see how many lights turn green, and write this down. This way you can eliminate some symbols that won't be part of your code.
After you know which symbols are in the puzzle, try making different combinations. Each time you try a combination, write down which sumbols you put, in which order and how many green lights went on. Writing it down will make sure you don't forget what you did, that way you can figure out the right combination faster.
Step 4 -
After having unlocked all three puzzles, you will get acces to the Mysterious Stone Temple. Some people have been getting a fourth puzzle that has zero tries, this is a glitch, to fix it, refresh the page.
|
Mysterious Stone Temple
Looks like you've done it. With a soft hiss, the door slides open and allows you to enter. A gleam of metal on the floor catches your eye, and you quickly pocket the object.
|
- END OF CHAPTER 3 -
Back to top
|


 {{ loadingMessage || 'Loading, one moment please'}}

