
Blinkie Tutorial
What is this tutorial about?
This is a very basic tutorial to explain you how to make a simple blinkie. If you like, you can make yours as fancy as you please, but this tutorial will only teach you how to make a simple one.
This tutorial is a tutorial that only uses freeware (programs you can download for free), this means everyone will be able to follow this tutorial; you will not need any expensive programs.
What programs do you need?
You'll need three different programs in order to complete this tutorial. First of all you need MS Paint, this program should be on all computers running on Windows.
You will also need two other programs, you can download them using the links below if you do not have them yet.
| - Irfanview
- GIFanimator |
Step 1: choosing an image.
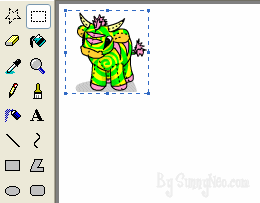
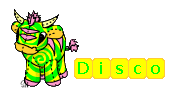
First you need to to find an image you want to use for your blinkie. In this tutorial we will be using the Disco Kau Plushie, but you can use any image you wish.

Right click on your image and you choose Copy.
Now you should open up MS Paint, it should be in Start, Programs, Accessories on your computer.
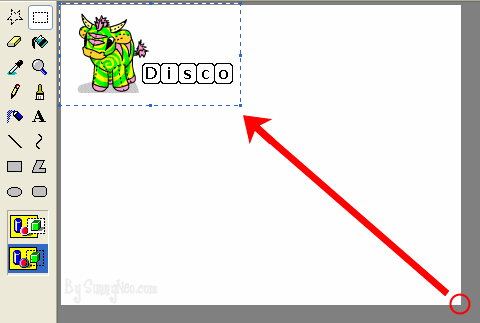
How big your work field is depends on the last time you've opened MS Paint and what you've done on there. It's best you use a work field of 400 x 300 pixels. You can change it by going to: Image, Attributes. Then change the width to 400 and the height to 300.
Next step is to paste the image into MS Paint; you can do so by clicking on Edit, Paste. (or CTRL V)
Your image is now on the work field, and it is still selected, you'll need to move it slightly out of the corner, as you don't want the image to touch the corners. You can do so by dragging the image a bit to the right and a bit down. Just a tiny bit is enough. Your screen should now look like the image below:
Step 2: adding blocks.
Next you'll want to add blocks to your blinkie. Before you can continue to do this, you should set your Paint workfield to transparent. What this option does, is that it makes the white background of things disappear. As you can see your workfield has a white background, so if you select something and drag it, it will also drag the white background along with the image. That's not something you want to happen. You want to drag the blocks, not the white background of the working field. You can set your workfield to transparent by clicking on the button that looks like the one below.

Now you're almost ready to start adding blocks to your blinkie, but it is advisable to magnify your working field. This way you can see the details more clearly. You can do so by clicking on the magnifying glass and then clicking in the workfield.
 (magnifying glass)
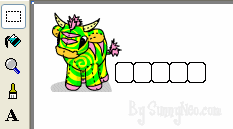
Now it's time to add blocks to our blinkie. Blocks are used to put the blinking text into. First you have to draw the blocks; you can make them any way you wish. For the tutorial the following block is used:

You can copy and paste this one, or draw your own using one of the tools in the toolbar. Tools that can be used to make blocks are:

Draw as many blocks next to each other as you have letters in the word your blinkie should have. The word the blinkie we'll be making in this tutorial is Disco, so the blinkie will need 5 blocks, for each letter one. Afterwards it should look like this:
Step 2: adding text.
Now it's time to make the text for the blinkie. Click on the text button in the toolbar:

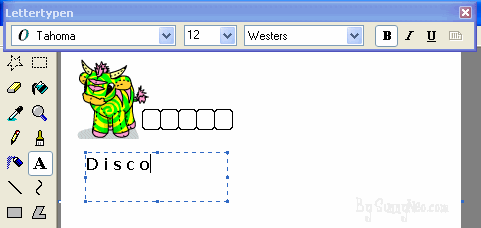
Select a square below your blinkie big enough to fit your text in. Once you've done that a text menu will pop up where you can pick a font type and font size. Just pick a font you like and a size so the text fits into your blocks. For this blinkie I've used Tahoma, size 12, bold.
Type the word you want to use for your blinkie. Make sure there is a space between each letter. In this case D i s c o
Your screen will be slightly different if you are using the English version.
In order to move the text into the blocks you have to click on the selection tool.

Use the tool to select the first letter, and then drag it into the first block. Do this with all the letters until you have the following:
Step 3: making the image ready for transperancy.
You'll want to make your working field smaller. Now that you're done making the template of our blinkie, you should make the work field equal the image that you are making. You can adjust the work field manually by going to the corner of the work field (there is a little block there). Your cursor will then change into a diagonal arrow. Then you should just drag the border of the work field closer to the blinkie. Make it so that the blinkie just fits into the work field, with not much extra space:
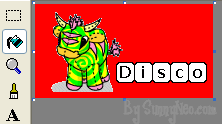
Because you want a transparent blinkie, you must make the background a color that is NOT in our image. You can't use white, because the eyes of the kau are white. In this case you can use red, because there is no red in the Disco Kau Plushie. Click on red in the color panel at the bottom of MS Paint.
Click on the flood fill icon in the toolbar:

Then click on the white background of the image to make it red.
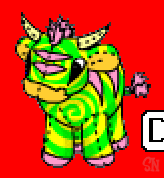
Magnify your working field using the magnifying tool. Do you see those little grey and white pixels surrounding the kau plushie? Those will look very ugly in your blinkie. You will have to remove those first. (Your color should still be on red). Now you should color all those grey and white pixels red, using your flood fill tool, or the pencil tool. If you're done it should look like this:
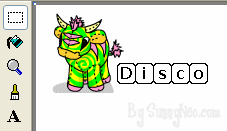
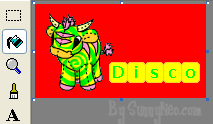
For the final touches on your blinkie, you can color the blocks. You can pick any colour you like. Colours that are already in the picture of our blinkie are preferred if you want everything to match. If you want to pick a colour from your image you use the eyedropper tool:

Select the eyedropper tool and click on one of the colors on the image, that way you'll have selected that color. Then you click on the flood fill tool and you fill the blocks with that color.
You can also color the text of the blinkie, and the border of the blocks.
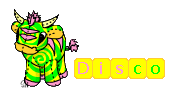
Here, yellow is used to fill the blocks, the text is colored green, and and the border of the blocks orange.
Step 4: making transparent frames.
Now our basic blinkie is done! Of course this blinkie doesn't blink yet. In order to make it blink, you have to save each step of the blinkie (frame) separately. You won't save them in Paint, as Paint ruins the quality of the image.
First you need to copy the image so you can paste it in the other program. You can do so by clicking on: Edit, Select all. And then: Edit, Copy.
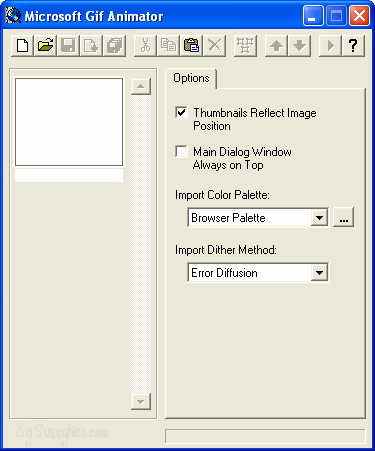
You should use Irfanview to save our image. Open up Irfanview. Irfanview looks like this:
In order to get our image into Irfanview, you need to click the following: Edit, Paste.
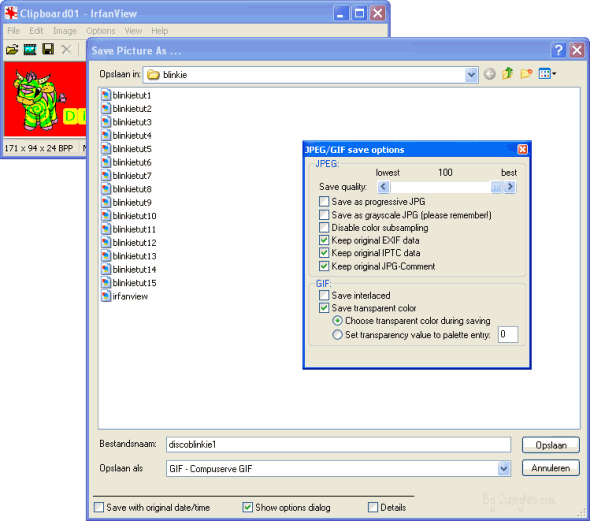
Now that your image is there, you can save it. You save it by clicking on: File, Save As.
After you've done this a new window will pop up. Where it says 'Save as type:' you have to select GIF - Compuserve GIF
In the little window, where it says GIF: you have to select, Save as transparent color, Choose transparent color during saving.
As file name, you should pick any name with the number 1 in it, because this is the first frame. We used discoblinkie1.
Make sure all the options you've selected look exactely like the picture below.
Your screen will be slightly different if you are using the English version.
After you've clicked on save a new window will pop up, asking you which color you want to make transparent. You want to make the red transparent. To do this, simply click anywhere on the red in the picture, and then you're done.
You have just saved your first frame, you also need to make the other frames and save each one of those separately. The next frame you will have to make is a frame with the first letter in your blinkie coloured differently. We have chosen to make it pink (you can do so by using the eyedropper tool to select the pink from the Disco Kau Plushie, and then using the flood fill tool to color the letter.
Then you have to save it just like you've saved the first frame. Select all, Copy. Paste it in Irfanview, Save as a gif, and choose red as our transparent color. Don't forget to put a 2 in the filename of this image.
Now there are a few more frames left to make:
-Frame 3: first two letters colored pink
-Frame 4: first three letters colored pink
-Frame 5: first four letters colored pink
-Frame 6: all five letters colored pink
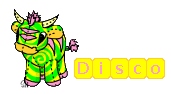
When you make these frames, just repeat the steps you've been through above, save each one individually in Irfanview. When you're done you should have the following images (note that they are transparent now, no more red):


Step 5: making the image blink.
Now you can animate your blinkie! Open up GIFanimator first. It looks like this:
You have to add the images in reversed order to make the blinkie work properly. First click on open:

Open the file with your sixth frame. (name6.gif)
Now you can add the other frames. You do this by clicking on the 'add' button:

Then select the 5th frame, the 4th frame, the 3rd frame, the 2nd frame, and the 1st frame. Then add the 6th frame and the 1st frame again and again.
The reason for adding the 6th and 1st frame again is that the blinkie will blink two more times completely after it's done with each letter.
This should be your order: 6 - 5 - 4 - 3 - 2 - 1 - 6 - 1 - 6 - 1
Now on to the details of the blinkie. you also want to adjust those. First click on the 'select all' button:

Then click on the tab that says Animation.
Select the option Looping, and below that, Repeat Forever.
Then click on the tab that says Image
Where it says Duration (1/100 s) you have to fill in a number of seconds to define the speed of the blinkie. Best is if you find one you like by trial and error. Try filling in a number and then click the 'play' button:

If you like it you keep it that way, if you don't, you change the number and try again. in this tutorial we've chosen a duration of 25.
Now you're done! All there is left to so is to save the blinkie. Click on Save as:

And save your blinkie.
All there is left to do now is for you to upload the blinkie on a host that allows you to direct link your image. Try SunnyNeo's Uploading Images Tutorial if you need help uploading your image.
How to put the blinkie in your lookup:
First change your full name at your User Info to:
<u>.</u>
(You can put your name behind, or in front of the <u>.</u> if you like. If you remove the period between the <u></u> the blinkie won't work!)
Every time you go and change your user info, you will need to make sure the <u>.</u> is still in your name. if you don't do this and you click 'Change your details', it will take the coding out and the blinkie will no longer work.
Then add the following code to the 'About Me' box on the same page. You'll need to alter the code to match your own blinkie; add the image url, height and width of the blinkie in the code.
 {{ loadingMessage || 'Loading, one moment please'}}

