
Black and White Tutorial for Paint Shop Pro
What is this tutorial about?
This tutorial will teach you how to make a black and white image, which has one part of it stand out in colour.
In order to continue with this tutorial you will need a program called Paint Shop Pro. In this tutorial Paint Shop Pro 8 is used. If you are using a different version of PSP things might look a little different for you, but the overall idea will be the same.
Step 1: Getting started
First, open Paint Shop Pro.
Now it's time to find yourself an image you want to try this method on. For this tutorial we will be using this lovely wingoball image. If you have found your image, right click on it and select Copy.
Now head back to PSP. In the menu Edit... Paste... Paste as a new image or press CTRL-V.
After you have done this, your image will be pasted into PSP. Now it is time to fix the colours. You can do this by going to Image... Increase color depth... 16 million colors (24 bits), or press CTRL+SHIFT+0.

Step 2: Selecting the coloured part
Now its time to select the part of the image we would like to stay coloured. In order to do this we will use the Magic Wand. You can find the Magic Wand in the tools menu, in the dropdown menu next to the Selection Tool.

You also need to set the mode of your Magic Wand to Add(Shift). This means that every time you click somewhere with the Magic Wand it will get added to your selection, rather than make it a new selection.
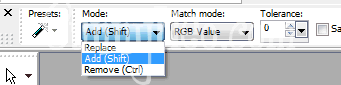
An important part of the Magic Wand tool is the Tolerance setting. This determines how exact your selection is. If you put your tolerance at 0, the only bits that will get selected are ones with the exact colour as the pixel you clicked on. If you put your tolerance at a very high number, the selection will become much broader and colours close to the one of the pixel you clicked on will also get added to the selection. You might want to play around with the tolerance and see how it works exactly if you have never used this option before.
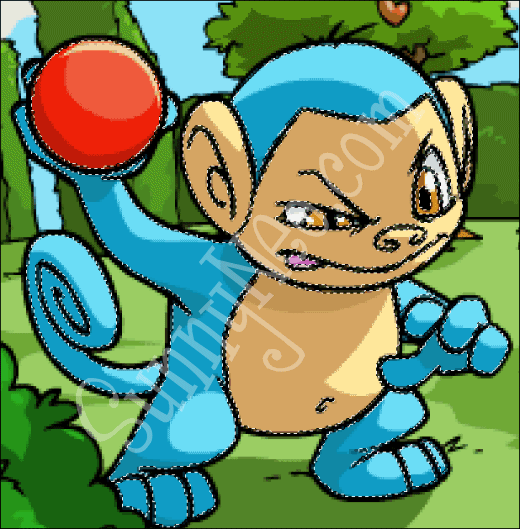
In this picture, we would like the Mynci to stay coloured, so we need to select the entire Mynci. Every time you click on a part of the Mynci you will see that part gets added to your selection. In order to select the Mynci you can start with a high tolerance for the bigger body parts, and set it a bit lower for detailed things. The most important thing to remember is that you should only select the Mynci. As for the black parts of the image, it does not matter whether they are part of your selection or not; since we are making a black and white image, converting black to black stays the same. You just need to watch out that you are not selecting the grass, trees etc. If you made an error and accidentally selected too much, just press the Undo button (or CTRL+Z). Scroll up and down with your mouse to zoom in and out of the image, so you can see the details better when selecting.
When you are done, your selection will look something like this. As you can see it does not matter if you have selected all the grey and black pixels or not. The most important part is selecting the huge coloured parts of the image.
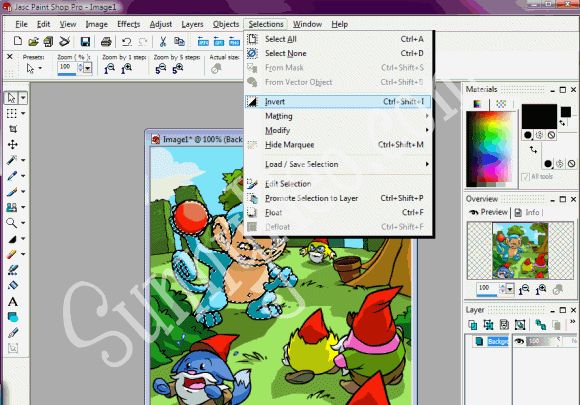
Now that we have selected the Mynci, its time to revert our selection. We need to select everything that we want to turn black and white. PSP has an easy tool for this. You can find it by going to Selection, Invert (or press CTRL+SHIFT+I).
Step 3: Turning things black and white
There are several ways to do this, we will explain two ways. Depending on your version of PSP you might not be able to do both ways, so try find out which one works for you.
Step 3.1: Using the effects browser
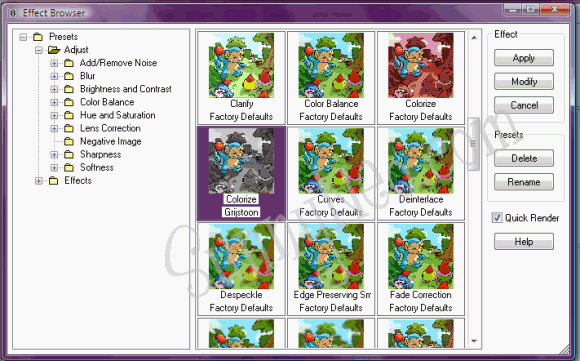
PSP has an overview of all special effects you can use; it is called the effect browser. Go to Effects... Effects Browser to locate it. A new window will pop up. If you click on the Adjust folder at the left side of the screen the browser will show you all possible adjustment effects for your image. There should be an effect that will show you a small preview of the coloured Mynci in a black and white background. If you have found it, click on it, and then choose Apply.
If you have not been able to find this effect, this means that your version of PSP does not have it, if so continue to step 3.2. If you have been able to find it, continue to step 4.
Step 3.2: Using a script
Another way to turn the background black and white is by using a script. You should have a toolbar at the top of your screen that shows you scripts (if you don't have it, try going to View... Toolbars). You can see it in the image below:
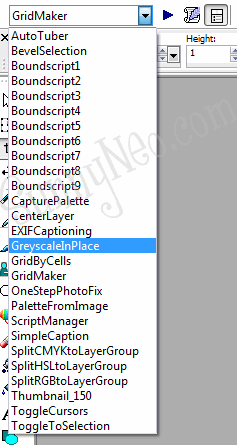
One of the scripts should be called GreyScaleInPlace (if not, there might be something similar to it depending on your version of psp). Click on the script in the dropdown menu and then click on the execute button.
Step 4: Finishing up
Now go to Selection... Select None (or press CRL+D).
Now you are done! Below you can see the end result.

 {{ loadingMessage || 'Loading, one moment please'}}

