
Cursor Tutorial - Freeware
What is this tutorial about?
As you can see on this page, you can change the plain pointy cursor into something much more fun. This tutorial will teach you how to do so, using two free downloadable programs.
Important note:
Cursors do not work in all browsers, they work in Internet Explorer 6 or higher and a few others like MSN Explorer, but not all.
What do you need?
You'll need two different programs, namely: Irfanview and IconArt. You can download these here if you haven't already:
- Irfanview
- IconArt version 2
Step 1: Choosing an image
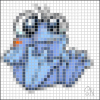
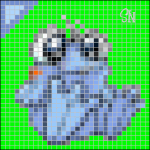
In order to get started you need to find yourself a spiffy image you want to turn into a cursor. I've chosen for the old Plushie Quiggle Plushie, because it's just too cute! But you can use any image that you like.

You should right click on this image and choose copy.
Step 2: Resizing the image
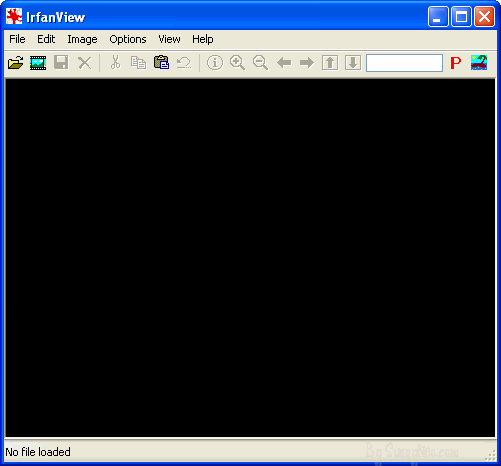
Naturally, this image is far too big for you to use for your cursor, so you will need to make it smaller. In order to do this we use the program called Irfanview. You should've installed it at the beginning of the tutorial, so now you should open it. When you open it, it looks like this:
Then you should paste your image into Irfanview, you can do so by clicking on Edit, and then choose Paste.
Cursors have a size of 32 x 32 pixels, that's why we will change our picture to a size 30 x 30.
You do this by clicking on: Image, Resize/Resample. You'll get the following screen:
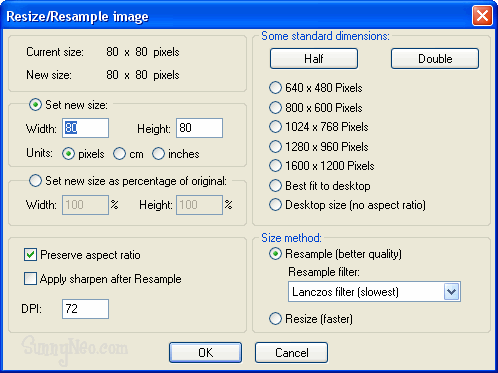
At 'Set new size:' you'll see that the width is currently 80. We'll need to change that to 30. If you do that the height automatically becomes 30 as well. Once you've set both at 30 pixels you click on OK.

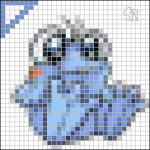
We now have a picture that looks like this. You should copy it to your clipboard by clicking on Edit and then Copy. Now we can move on with step 3.
Step 3: Making the cursor
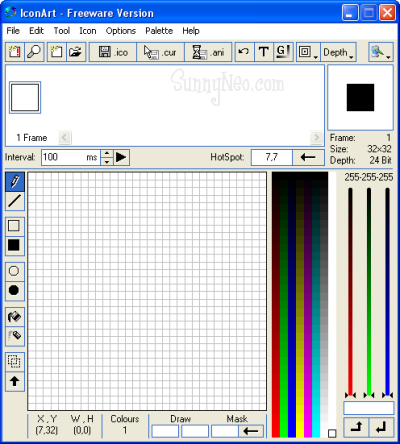
It is now time to open IconArt. It should look like the image below (or you will see the blue version; you can customize the look of the program).
Now it's time to import the image into the program. You can do so by clicking on: File, Import From Clipboard. After you've done so you'll get the following screen:
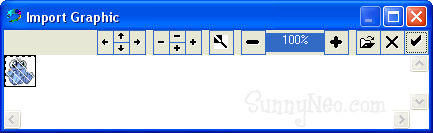
At this screen you click on the OK sign (the one selected on the picture) in the top right corner.
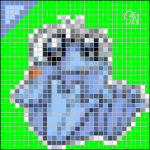
Now your image is inserted into the program, as you can see above (note that the image is made smaller and will look bigger on your screen). However it isn't positioned right. To move the image to the right position you have to hold the CTRL key on your keyboard, and press the arrow keys to move it. For our cursor we want to move the image to the bottom right corner. So hold CTRL and use the right and down arrow keys to get it into the right position. After you've positioned it, your image should look like this:
Just that image isn't a cursor yet. We also need an arrow we can use to click on things. We would like an arrow whose colors match with the colors of the image. That's why we will change the color palette from all colors to just colors that are in our image. To do this click on: Palette, Create Palette From Icon.
Now we can make an arrow. We will draw a triangle in the left top corner. In order to do this click on the following button:

Now you have to pick a colour for the border of your arrow. In this example we are using a colour of darkblue for the arrow. Simply click on a colour you'd like to use in the colour palette and you've set your colour.
Now you have to draw the triangle in the top left corner. You can make it any way you want, you could also draw an arrow for example. We use a triangle that looks like this:
You also need to fill the triangle with a color. We will pick a color of lightblue for this. Just click on a color in the color palette and then click on the fill button, which looks like this:

Our next step is to check whether the background of the image is really white. Mostly it's a bit blurry with white and grey dots in them. We don't want that, as it's ugly. First step in checking this is putting the color palette back on all colours. You do so by clicking on: Palette, Set Palette - Full Color.
Now we select a color that is NOT in our image yet. In this case we could pick lime green. Click on lime green in the colour palette. Then fill the white background of your image with green just like you filled the inside of the triangle. Your screen will look like this:
Well now that's not very pretty, is it? All that grey blur around the image. We will make sure all of it is lime green, except for our image and triangle. You can do so by clicking on the grey pixels in the image while you have selected the pencil tool:

When you're done your image screen should look like this (isn't that a lot better?):
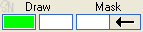
Well now obviously we don't want a cursor with a green background, so while saving it you need to set your mask colour. The mask colour determines which colour will become transparent after you save your cursor. In this case you want it to be lime green. Make sure your draw colour is on lime green, and click on the arrow next to mask. (The mask function can be found at the bottom of the program.)
At the top right of your screen you will see a change like you see below:
 |
 |
The black stuff is what is transparent, and the white stuff is what will become your actual cursor. This means that before you set the mask, only the eyes of the quiggle were transparent. Now that you've set the mask on green the background will be transperant, and the eyes won't be.
Now all that is left to do is set the hotspot. The hotspot is the place that is clickable. It is automatically set in the middle of your image, but we want to set it at the point of our arrow. order to change our hotspot we click on the arrow next to HotSpot:

Then you get the following screen:
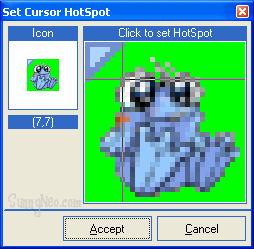
You click on the top left corner (0,0), this is the point of the arrow, and then you click on Accept.
Now you are done, and all that is left for you to do, is save your cursor! We want to save it as a .ANI image, so we click on the following image:

All there is left to do now is for you to upload the cursor on a host that allows you to upload .ANI images. A lot of free hosting sites DO NOT allow you to upload and host .ani file extensions. Currently we do not know any sites that allow free uploading of .ani files. If you know any, please contact us.
Step 4: Coding your cursor:
Here are the CSS codes to use, if you want to use your cursor somewhere on neopets:
Add an image cursor - internet explorer only
You need to put in your url where is says URL.
Add an image cursor - both internet explorer and firefox
You will need both an .ani and a
.jpg/.gif of your cursor for the cursor to work in both browsers. The reason for this is .ani cursors work in Internet Explorer but not Firefox, and .jpg/.gif cursors
work in Firefox but not Internet Explorer.
You need to put in the right URL of your cursor in where it says URL.ani or URL.jpg-or-URL.gif.
You need to put in the right URL of your cursor in where it says URL.ani or URL.jpg-or-URL.gif.
 {{ loadingMessage || 'Loading, one moment please'}}

